# CabinetX: a simple parametric cabinet
# What we'll make
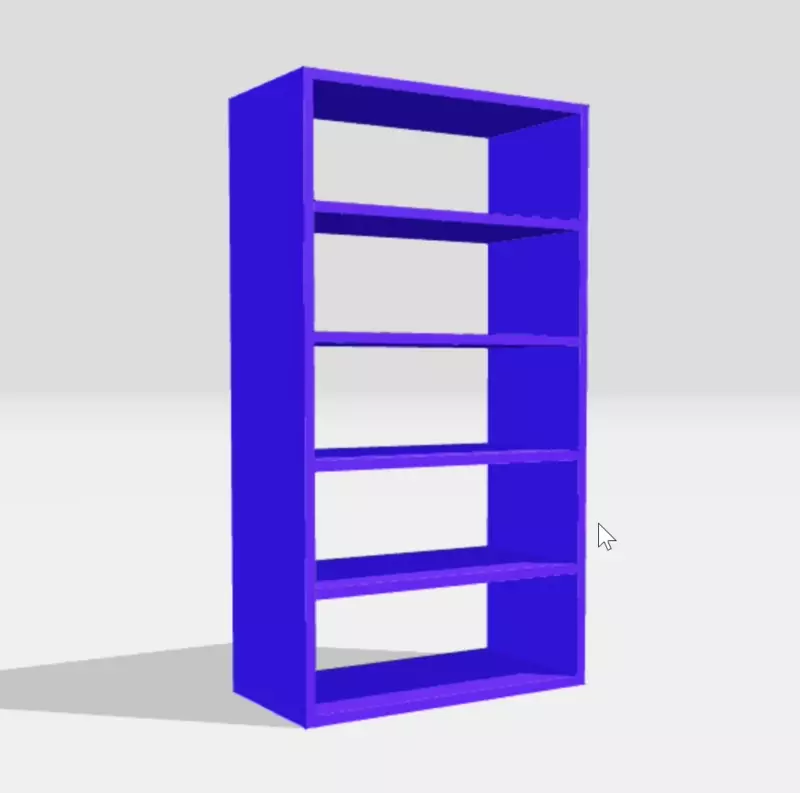
🚧 Making a cabinet is a good way to start modeling with rectangles and boxes and making simple arrangements with them. Of course Archiyou offers a lot of ways to make rectangular models: using primitives like box(), plane() and operations like Shape.extrude(), Shape.array(). There is also a powerful Shape.align() and Shape.select() function to arrange shapes in relation to each other.
This example is available as file CursusKast under File -> Open -> Shared Scripts.
# Step 1: Parameters and left side
Start by defining your parameter variables in the Parameter menu. We need at least:
- WIDTH - type: number, start: 30, end: 200 (or something in this range)
- DEPTH - type: number, start: 30, end: 120
- HEIGHT - type: number, start: 40, end: 300
- NUM_PLANKS - type: number, start: 3, end: 10
Units are centimeters. You can tell Archiyou with _units('cm') and set them in the Parameter definitions. The current values of the parameters can be plugged into the script by refering to their name with a '$'. So $WIDTH, $DEPTH etc.
Let's make the left side of the cabinet with this code:
sideLeft = box(2,$DEPTH,$HEIGHT) // make a box
            .align(vertex(),  // align it to [0,0,0] - vertex() defaults to [0,0,0]
                'bottomfrontleft',
                'center')
Run it and you should see something like this:
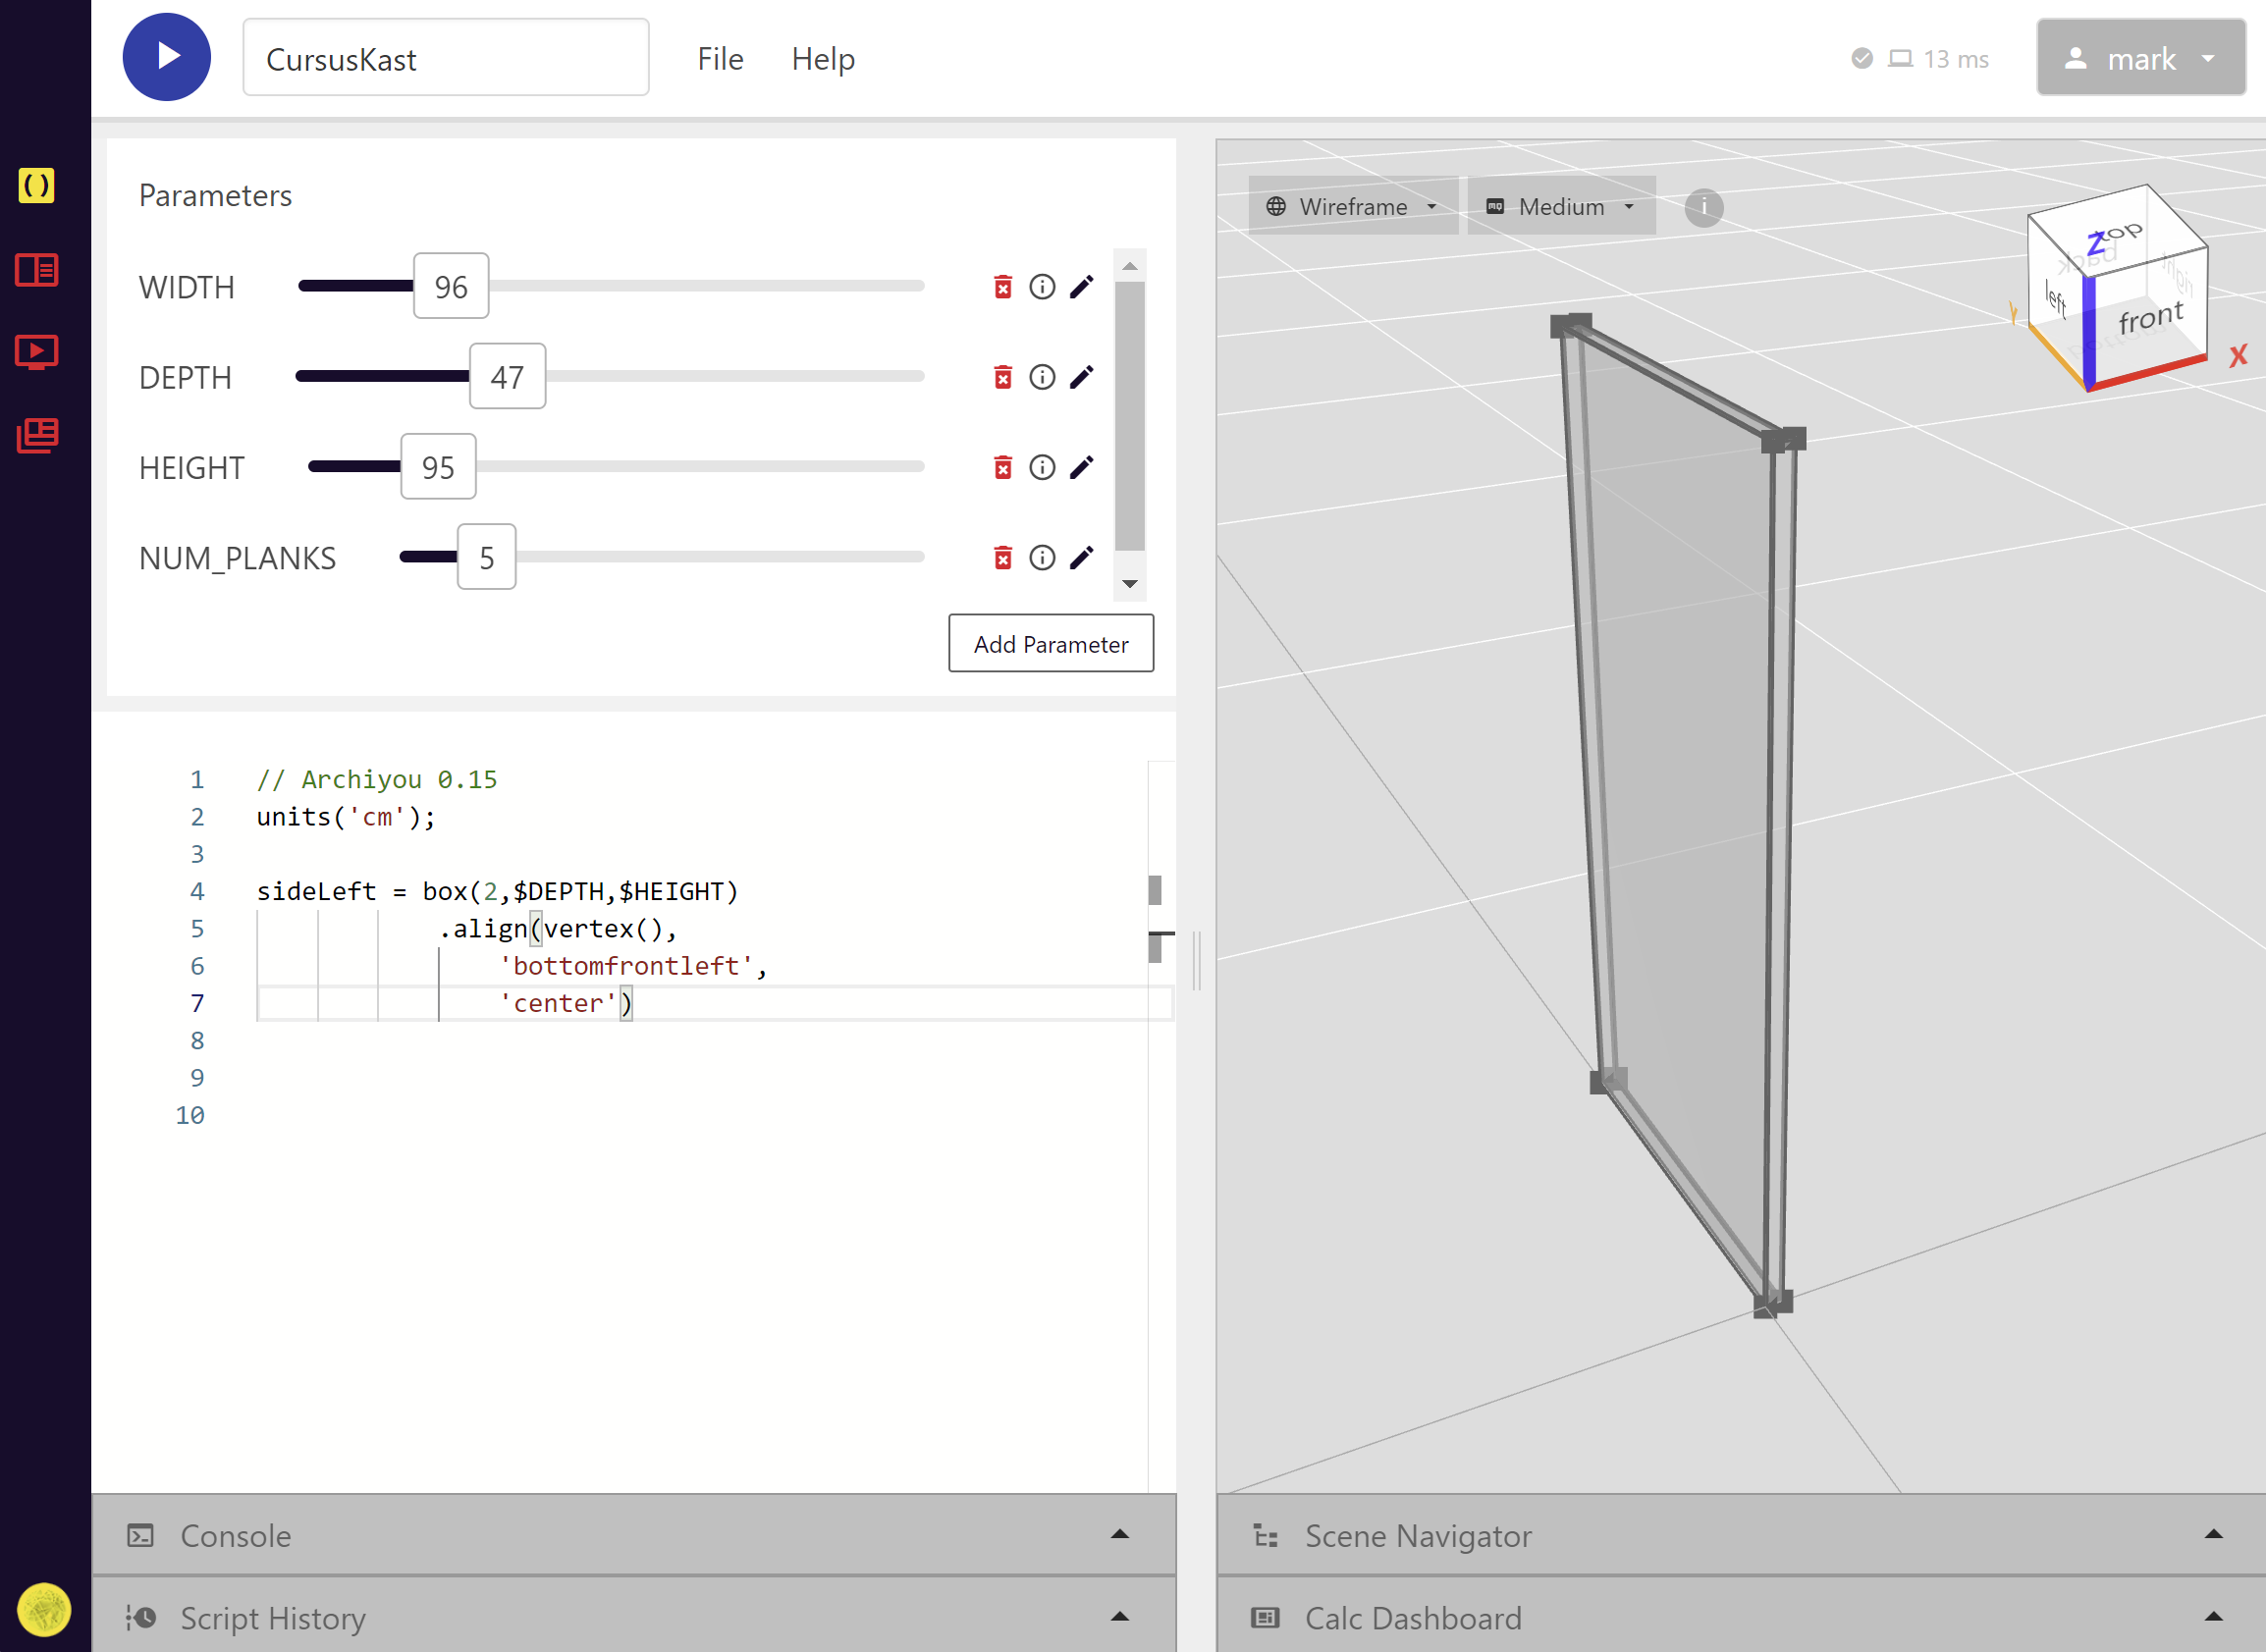
The code is pretty simple, but there are some interesting things going on:
- box().align(other:Shape, pivot:Pivot, alignment:Alignment) - This aligns the bottomfrontleft corner of the box the origin ([0,0,0]) of the scene.
- vertex() in the above command is shorthand. If you don't supply coordinates to this function it will default to [0,0,0]. So this is the same: vertex(0,0,0)
# Step 2: The other side and the first plank
Since the right side shape is the same as the left we can just copy the latter and move it along the x-axis at a distance of the width of the cabinet ($WIDTH). The command Shape.moved() does exactly that!
sideRight = sideLeft.moved($WIDTH);
TIP
For most operations Archiyou offers two versions: one on the current Shape and the other making a copy and then doing the operation:
box().move(100); // moves the one box
box().moved(100); // copies and then moves the one box: now there are two boxes!
// other examples:
box().scale(2);
box().scaled(2);
// and so on!
So now create the last shape that we need: a simple plank. It's always a good idea to stick to code that corresponds to how you would explain a plank verbally to a person: it's between this side and that side. This is the code:
plank = planebetween(
            sideLeft.select('V||frontrightbottom'), // the front-right-bottom corner of the left side
            sideRight.select('V||backleftbottom')
        ).extrude(2)
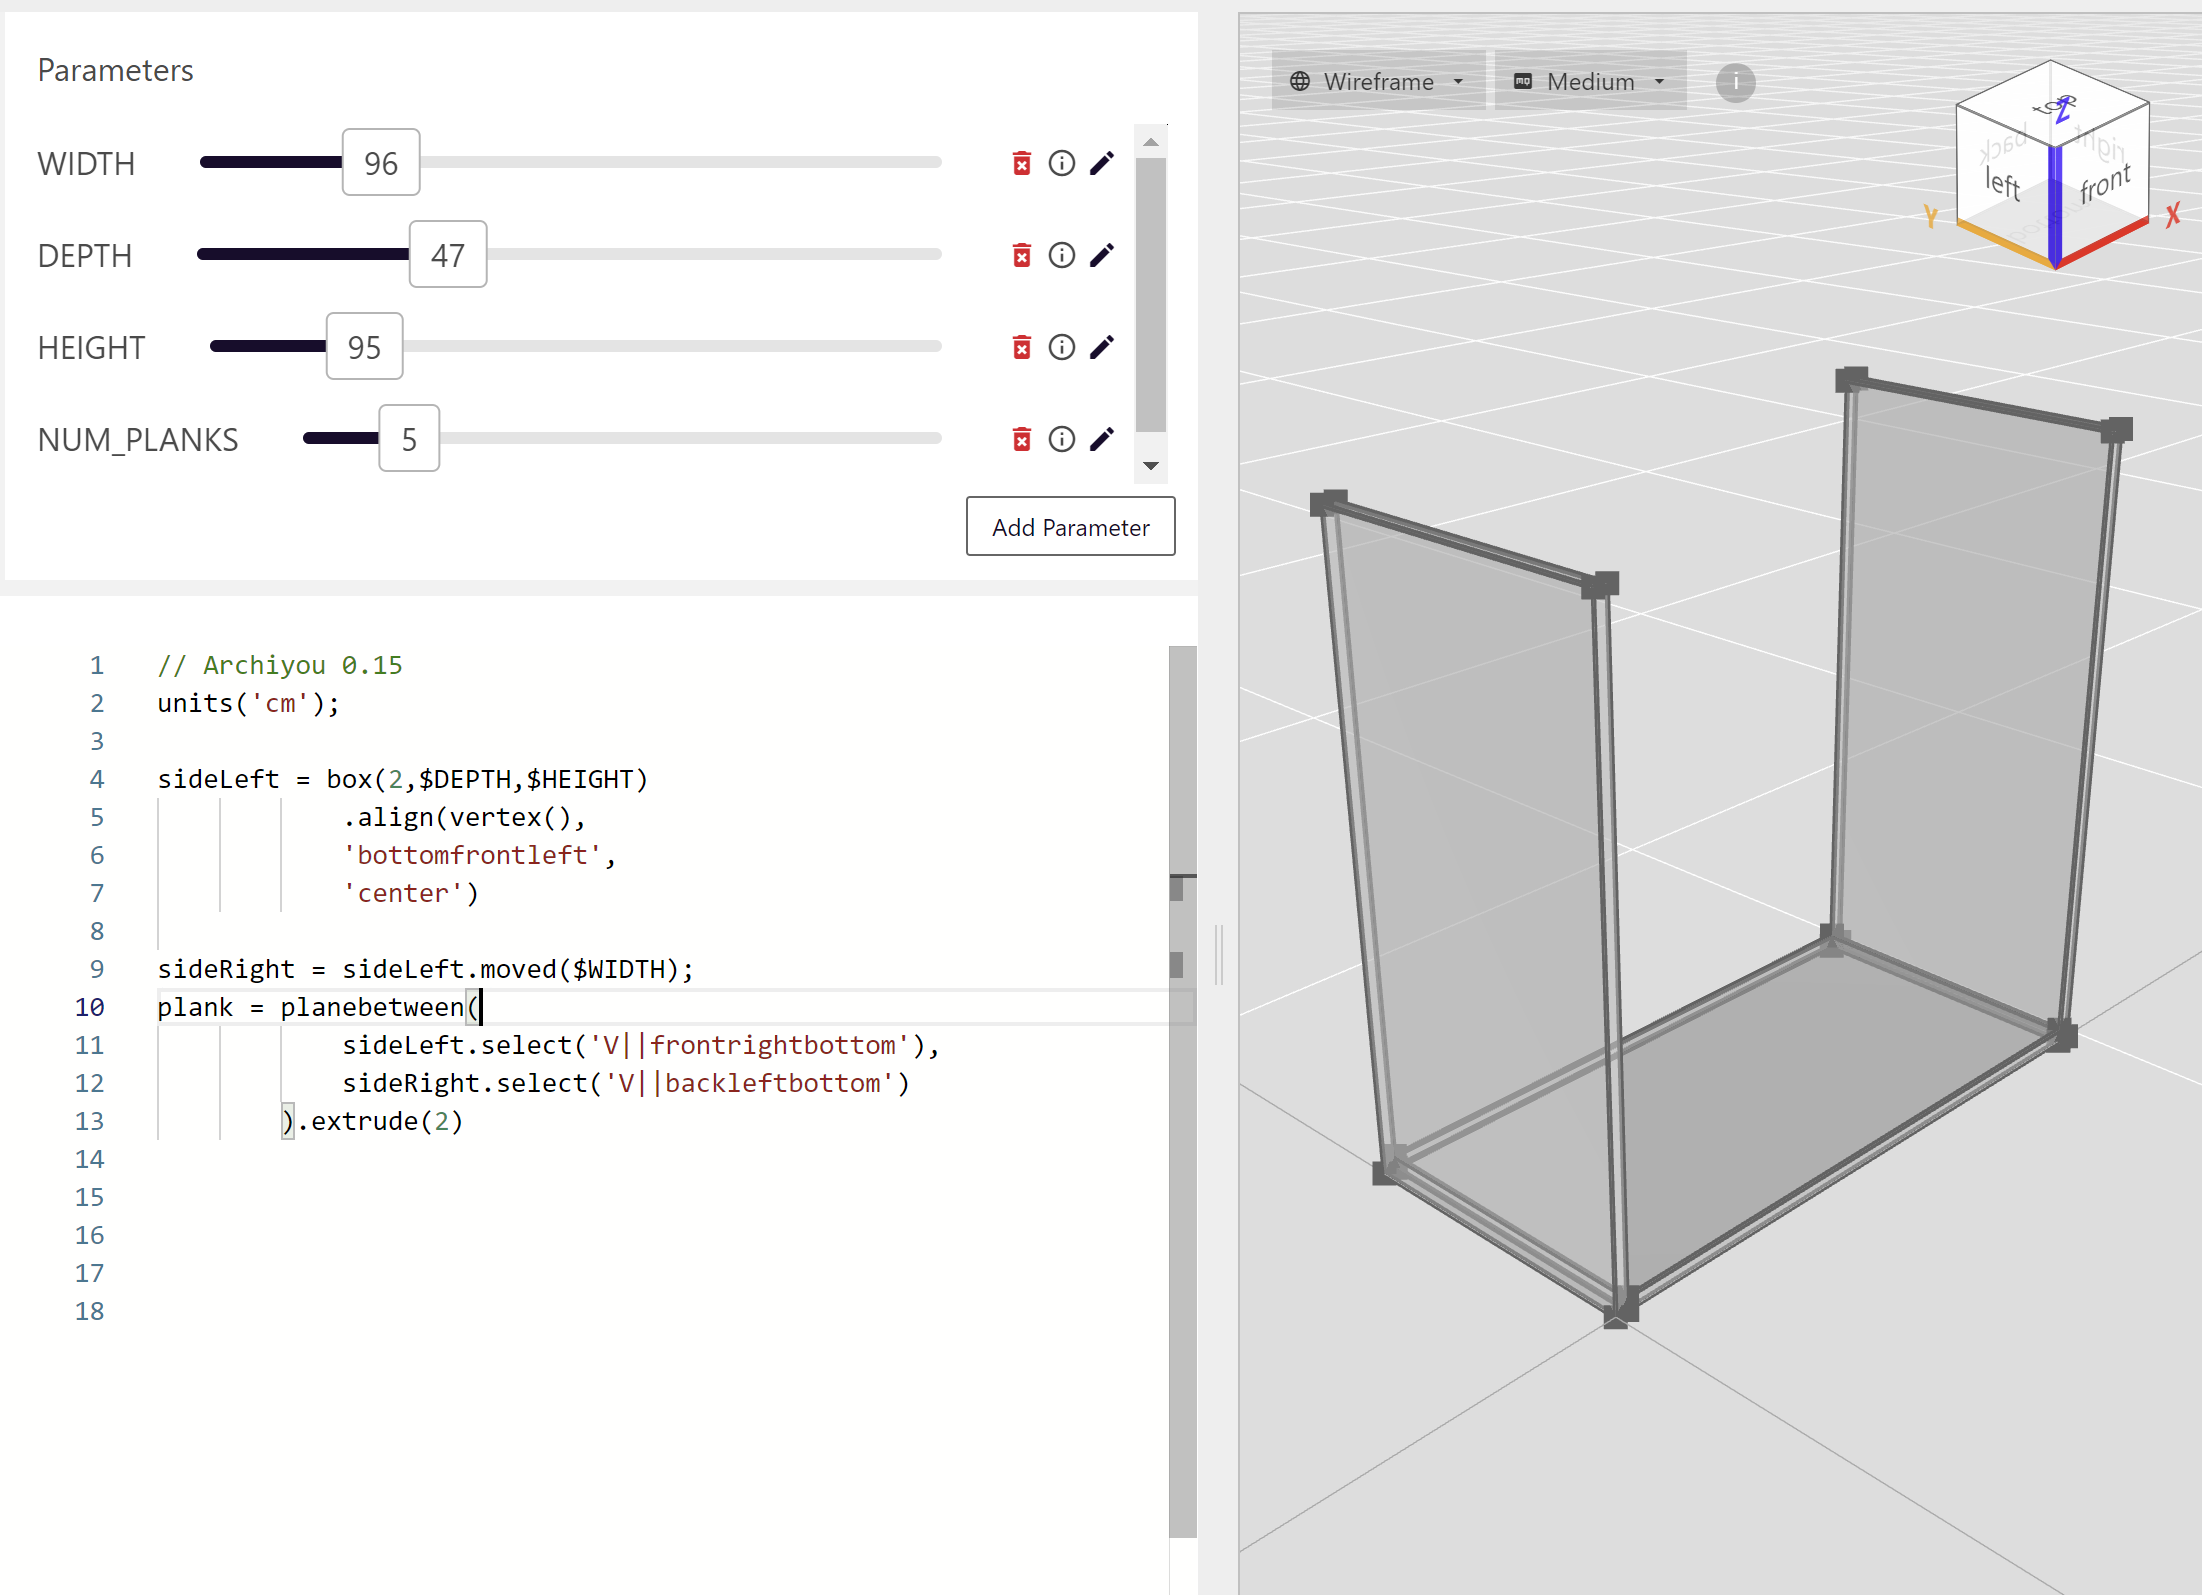
- planebetween() makes a plane between two points (or anything that looks like a point: Vertex )
- sideLeft.select('V||frontrightbottom') and _sideLeft.select('V||frontrightbottom') supply these points by selecting a specific vertex from the both sides. Read more on selectors here
- planebetween(..).extrude(2) - Lastly we give the plane a thickness of 2cm
When you run the code now you would something like this:
# Step 3: All the planks
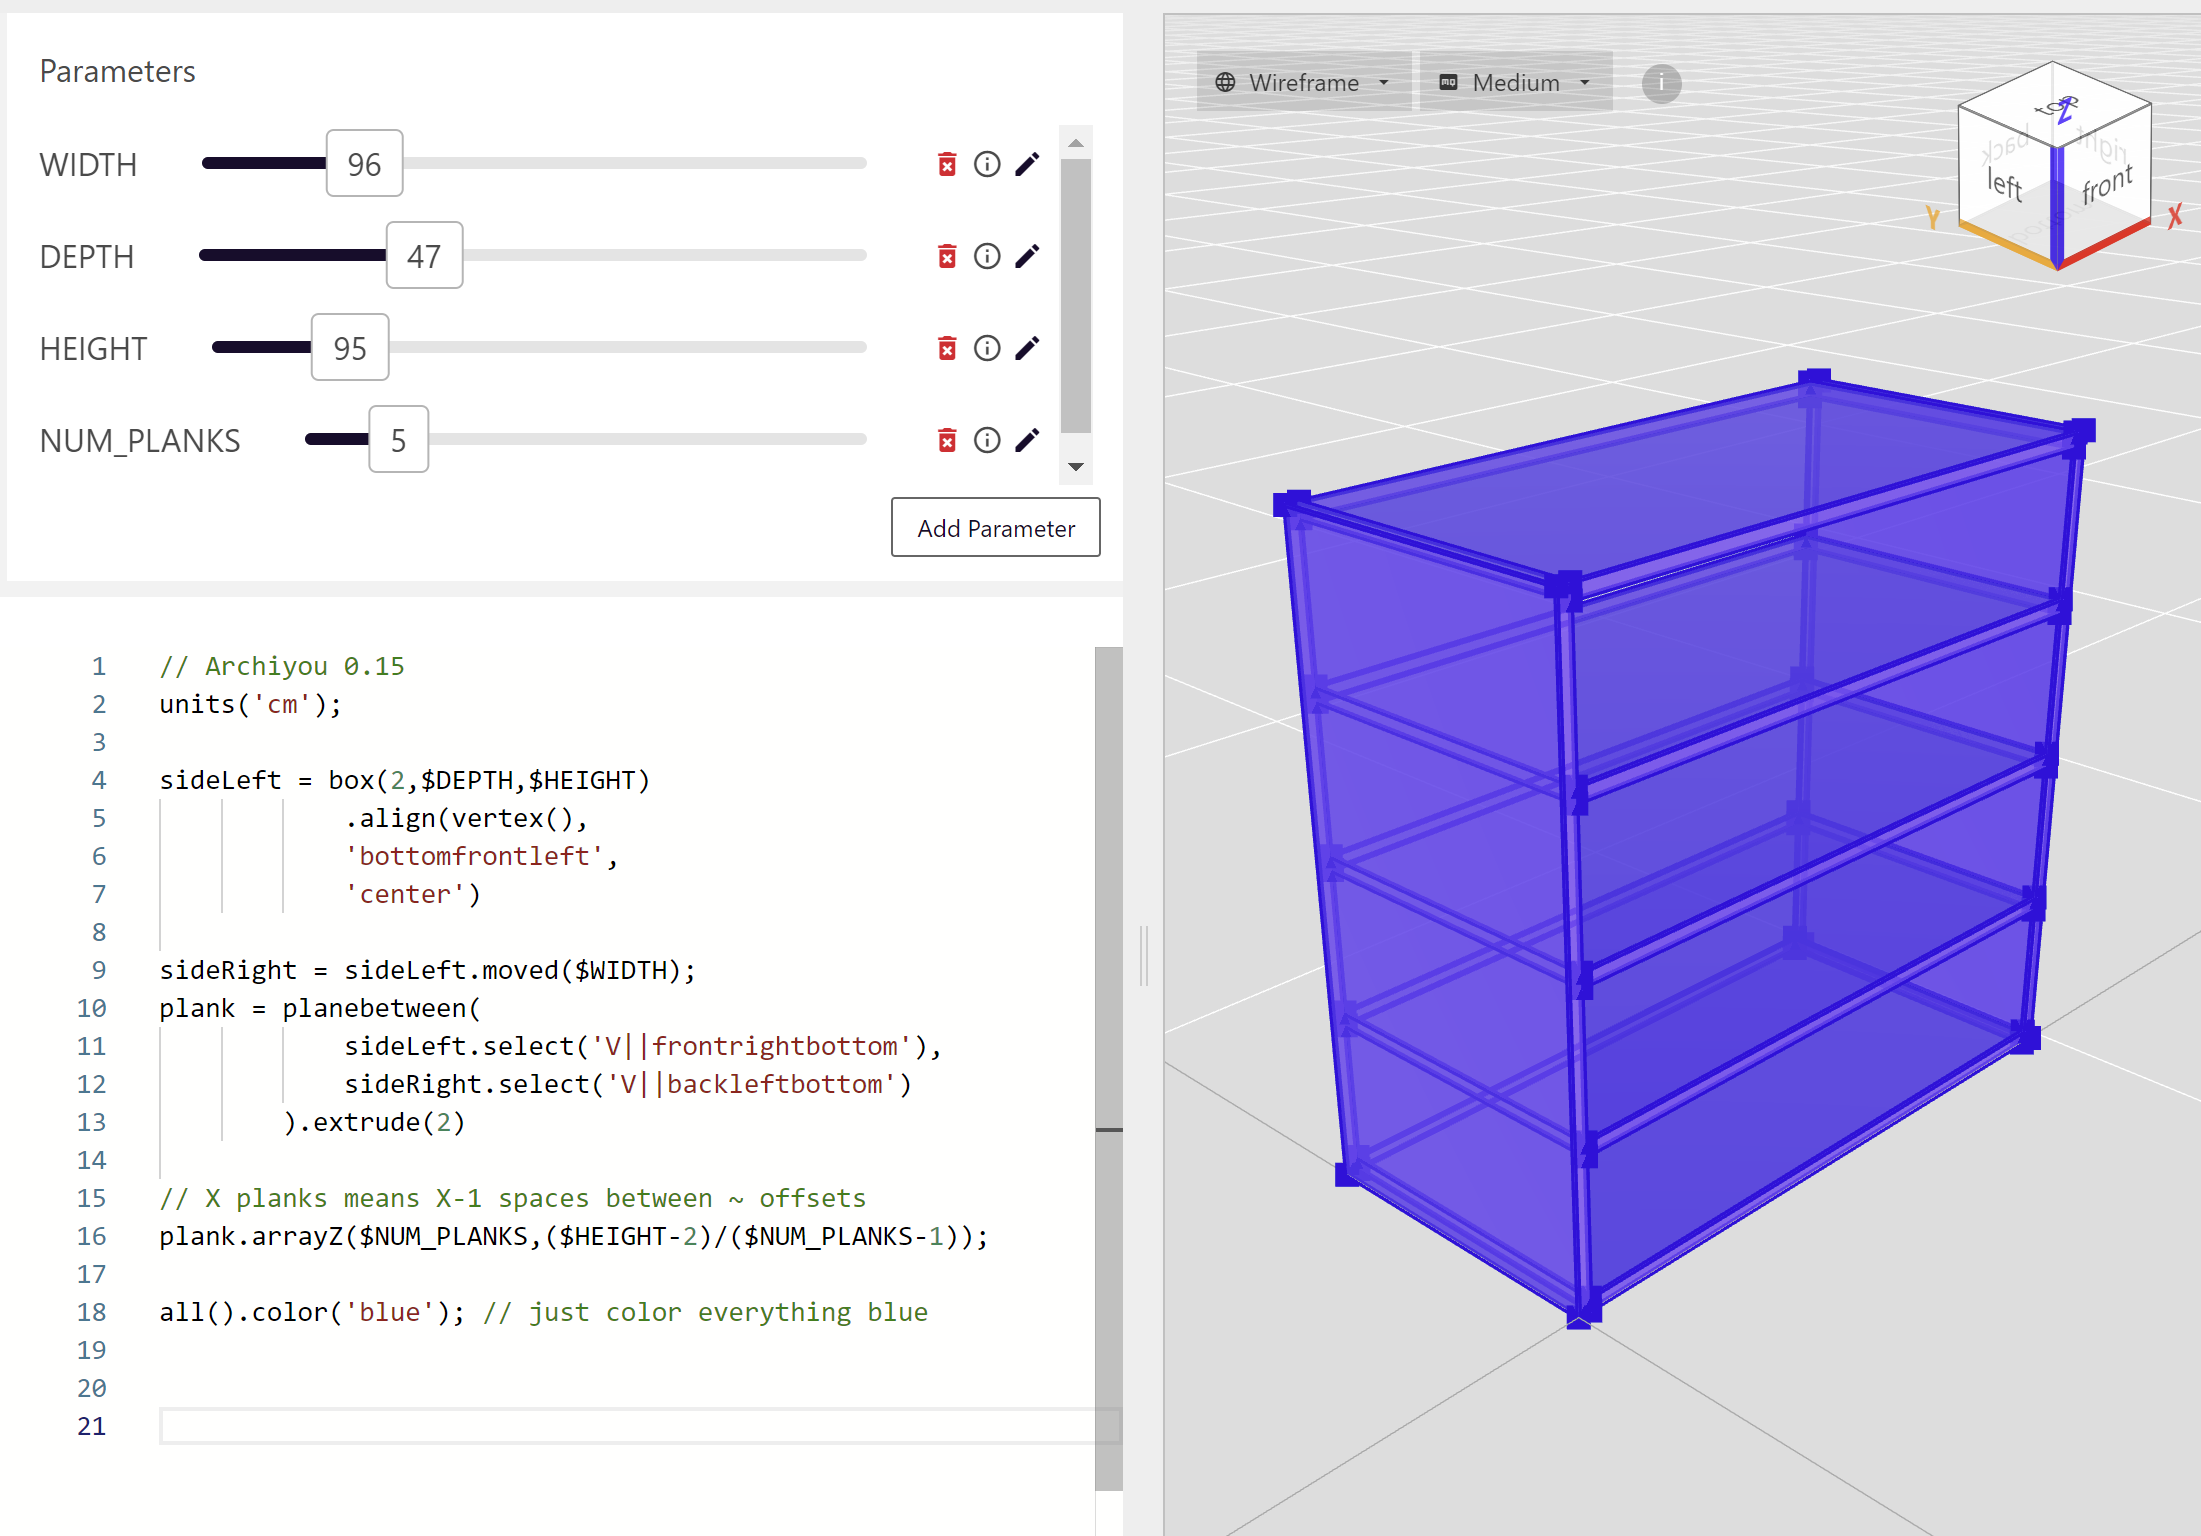
Let's get some storage space 📚 by simply creating the right number of planks ($NUM_PLANKS) with a distance of ($HEIGHT-2)/($NUM_PLANKS-1) between them.
plank.arrayZ($NUM_PLANKS,($HEIGHT-2)/($NUM_PLANKS-1)); // -2 = 2 cm of plank thickness
// There are actually $NUM_PLANKS-1 gaps between the planks
This is the end result:
# Full code
units('cm');

sideLeft = box(2,$DEPTH,$HEIGHT)
            .align(vertex(),
            'bottomfrontleft',
            'center')

sideRight = sideLeft.moved($WIDTH);
plank = planebetween(
            sideLeft.select('V||frontrightbottom'),
            sideRight.select('V||backleftbottom')
        ).extrude(2)

// X planks means X-1 spaces between ~ offsets
plank.arrayZ($NUM_PLANKS,($HEIGHT-2)/($NUM_PLANKS-1));

all().color('blue'); // just color everything blue
# More
- Try to model a book and place some into the cabinet!
